
The ongoing COVID-19 pandemic provided me with the opportunity to visit and re-visit a tract of redwood forest located near my home. The forest provided a challenge to capture images with my camera. I’ve recently added a gallery of images to my website (see Recovering Redwood Forest).
A forest is a challenging place to photograph. My respect for successful woodland photographers such as North Yorkshire’s Simon Baxter has only grown throughout this project. In this blog post, I’ll summarize my learning about photographing in a forest.
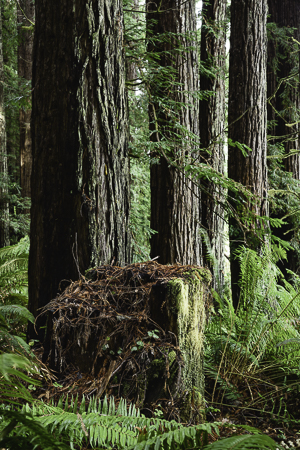
1. Visit and Re-visit. Always true but seems to have been even more important in capturing a difficult subject. This is a forest still recovering from what must have been clear-cut logging about 125 years ago. While the redwoods have gained a lot of ground, there is still competition among species, notably the Douglas Fir. The redwood canopy does not yet fully filter direct sunlight; multiple species of bushes compete with the ferns at ground level. Redwoods that apparently shattered on striking the ground are still present. In short, the forest floor is still chaotic. You’ve got to visit many times to begin to understand the story that you want to capture and what you want to frame with your camera.
2. It’s impossible to frame a full image of a single 100 – 150 ft redwood tree when that tree exists in a dense forest of similar trees packed together and competing for light and moisture. You’ve got to find alternative ways to tell the story you find in the forest. Too, the story is far more nuanced than an image of a tree alone.
3. Even with today’s high dynamic range cameras, full sun still means deep shadows and bright highlights. The resulting images are frankly unattractive. Just wait for an overcast day or, better yet, a foggy day. With a light overcast or a fog, there is still directionality to the light to help impart a sense of depth in your images.
4. Do bracket your exposures. I found that a bracket of -1, 0 and +1 eV was all I needed to help retain texture in highlights and shadows. Depending on your camera, you may want a wider bracket. I found it better to blend images in PhotoShop manually rather than using an HDR tool.
5. The old rule “use a polarizer” when photographing foliage remains true. The specular highlights from light reflecting off foliage are not attractive. A good polarizer solves most of the problem but does leave images actually a bit over-saturated. Be prepared to move the saturation slider to the left in post.
6. Color balancing is a major challenge. We are dealing with light that has been filtered and diffused through the forest’s canopy. It bounces off subjects that are deep brown, red and green. The resulting ambient light is generally very blue-deficient. No Auto White Balance algorithm is going to solve this challenge. The use of a white-balance card with correction using the eyedropper tool in ACR or Lightroom leads to hideous color casts. Our eyes and brains can not totally remove those color casts either and thus we are accustomed to the look of a forest that depends on a certain color temperature that may be quite different from daylight. The problem is less severe in forest along the river, where a good fraction of the light is diffused, unadulterated skylight, and more challenging deeper into the forest. I eventually came to simply set my camera’s white balance to “daylight” and adjusted white balance to taste in post, trying to maintain a consistent coolness to colors across the entire image set.
7. Tree trunks, especially if damp, are generally going to end up in zone 1 or 2 at best. Still, redwood bark is richly textured and I want my images to convey a sense of texture, even in the shadows. I found Tony Kuyper’s Triple Play Tool (part of his TK7 panel for PhotoShop) to be invaluable in retaining that sense of texture.
8. Use of a tripod is mandatory. Your may need to blend images in post. Light levels are generally low and you need the maximum dynamic range your sensor can deliver (meaning shoot at base ISO or no more than a couple of eV above base as conditions dictate). There is a lot of “stuff” that you want to keep out of the edges of the image; you’ve got to check and recheck before tripping the shutter.
9. I strongly preferred to focus manually, using live view with the lens wide-open to place the plane of focus exactly where I wanted it. Too many competing lines and contrasts in the forest are apt to confuse even the best autofocus systems.
10. Capture RAW images only and capture with as much bit depth as your camera will support. Don’t even think about 8-bit JPEGs.
No rational person is happy to have a pandemic about, taking innocent lives, inducing pain in those left behind, and wrecking economies. Once we have followed public health guidance (masks, avoid crowds, wash hands, get vaccinated as soon as able), we need to find something constructive to engage our minds and energy. I had long postponed photographing in the redwood forest, understanding at least some of the challenges intuitively. While I’m sure I am not finished in the redwood forest, I am thankful for the time I’ve been able to devote to this challenging project.